Up and running with Aurora Serverless
Amazon RDS is a fully managed Relational Database Service on AWS. Amazon Aurora is a MySQL and Postgres compatible database with much better performance at scale due to the enhancements and rewriting AWS has put in. For more context on Aurora, here is my earlier post.
Aurora RDS has several practical configurations applicable to pretty much all production workloads (Multi region, Multi-flavored read replicas FTW!). The ones I like the most are Aurora Global Database, and Aurora Serverless.
Imagine a fully managed database in the cloud that needs minimal upfront setup, scales on demand, and saves $$ by pausing when not in use. In a nutshell, thats exactly what Aurora Serverless is.
In this post I will talk about the fundamental concepts, use cases, setting up a cluster, taking it for a spin, and tips/gotchas.
Aurora Serverless Concepts
Amazon Aurora Serverless is an on-demand, out of the box auto-scaled Aurora MySQL 5.6 Database, which is Serverless, in that it will start, scale, and stop automatically. The start/stop cycle is also referred to as resume/pause. As with all RDS engines, Aurora Serverless is fully managed.
Usually we see the term autoscale used with EC2 instances, ECS Services, Lambdas, DynamoDB, etc. It is common knowledge that a relational database cannot autoscale. It can, however, manual-scale (or script-scale) vertically (beefier instance type) or horizontally (read replicas for read-heavy workloads).
Serverless Aurora does autoscale.
Autoscale Compute & Memory
Aurora Serverless uses ACU (Aurora Capacity Unit) as its capacity unit. This is comparable to provisioning RDS Instance types (db.t3.micro, db.r5.4xlarge, etc.) which have a fixed amount of compute, network IO, storage IO, and memory. We provide ACU limits (min, max) instead of picking instance types. An ACU represents a combination of compute and memory capacity. Note that we only pay for the ACUs consumed while the cluster is running, and not for the ACUs we specify as min/max.
The units range from 2 ACUs (4GB RAM) to 256 ACUs (488GB RAM).
The minimum ACUs and maximum ACUs limit the cluster’s scale down and scale up respectively. Aurora Serverless scales based on the number of connections, CPU usage, and memory usage. This event is initiated at a scaling point, where the need to scale is determined and executed. For scale down, there is a cooldown period of 15 minutes after a scale up event, and 310 seconds (~5 mins) cooldown after each cool down event.
Autoscale Storage
The storage autoscales from 10 GB to 64 TB (just like Aurora RDS).
Use Cases
Combined with autoscaling, on-demand startup and shutdown, and per-second billing, Aurora Serverless is a great fit for workloads that are infrequent and/or variable. Some of the examples can be -
- Test workloads, where a database instance is only really need during the test runs, and can be “torn down” after the tests have finished running.
- Batch Jobs, where the database is available for the batch job to store state, or any other related data associated with the job.
- Benchmarking the database requirements for a new application before provisioning an Aurora RDS Cluster. However, I feel performance testing on Aurora Serverless could be a stretch, as it’d autoscale, while the Production RDS (non-Serverless) will not.
- Unpredictable workloads, where database capacity needs to be autoscaled. I would not really do this in a production environment, as quite a few of Aurora RDS features are not available with Serverless Configuration, like -
- Replicas
- IAM Database Authentication
- Restoring from S3
- Few other limitations that can be a deal-breaker for some production workloads.
Setup
Aurora Serverless set up is accessible from the AWS Console just like other RDS Engines. However, it does not qualify for Free Tier. Also, it is only available for MySQL 5.6 compatible edition.
-
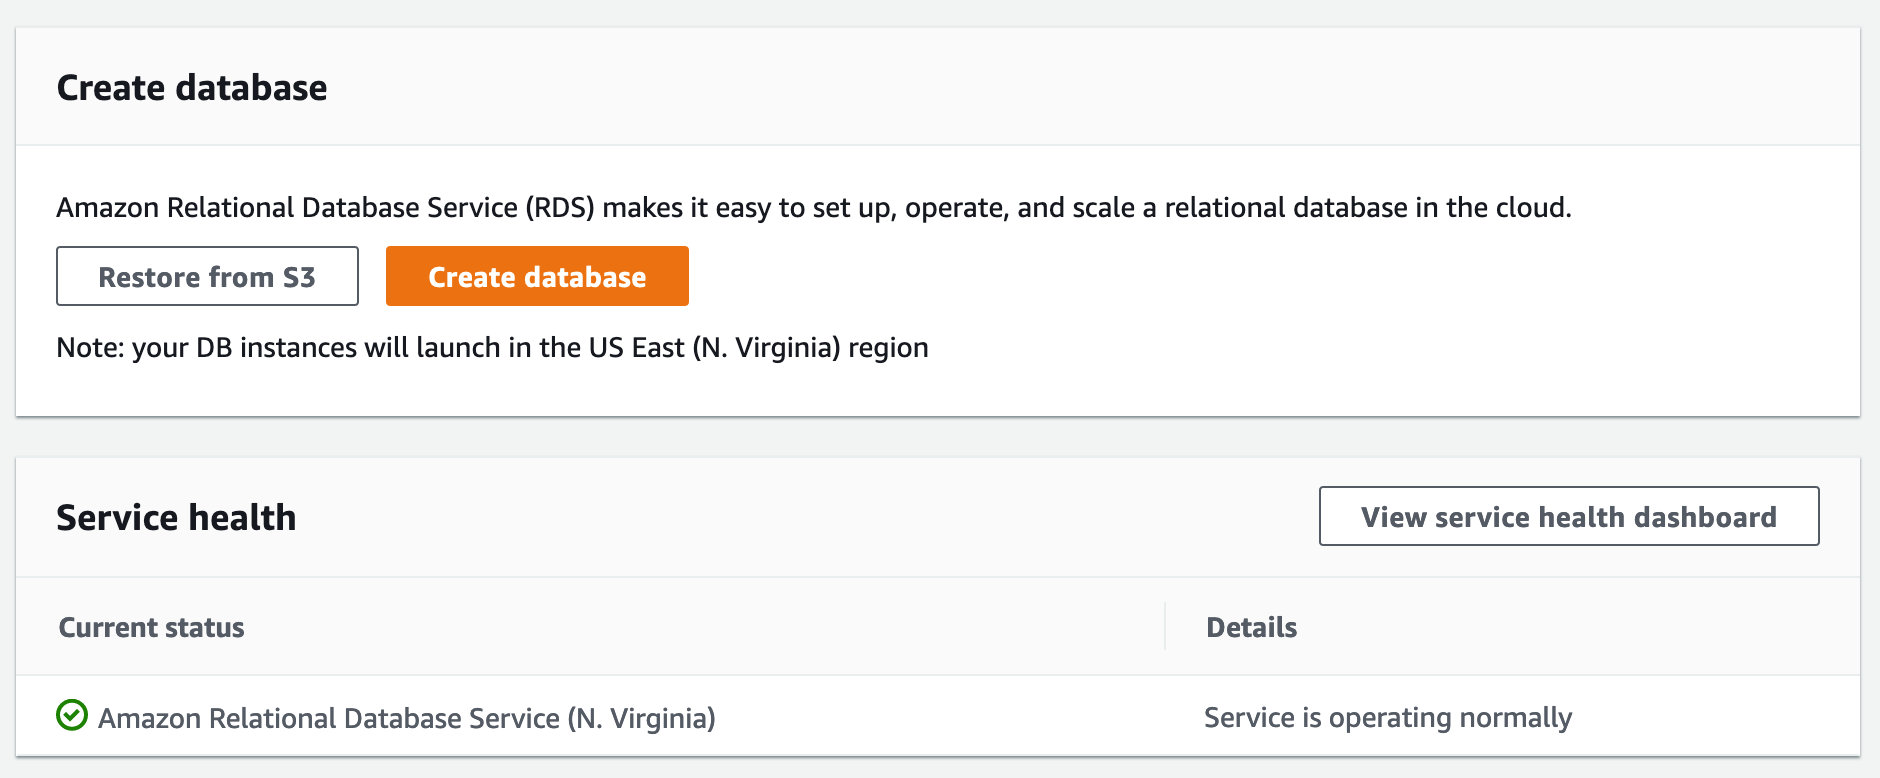
From the console, search for RDS to land on the RDS home.
-
Aurora Serverless is not available in all regions. I use us-east-1, you may want to switch to that if you do not see the configuration option in the steps below.
-
Click the orange Create Database button.
-
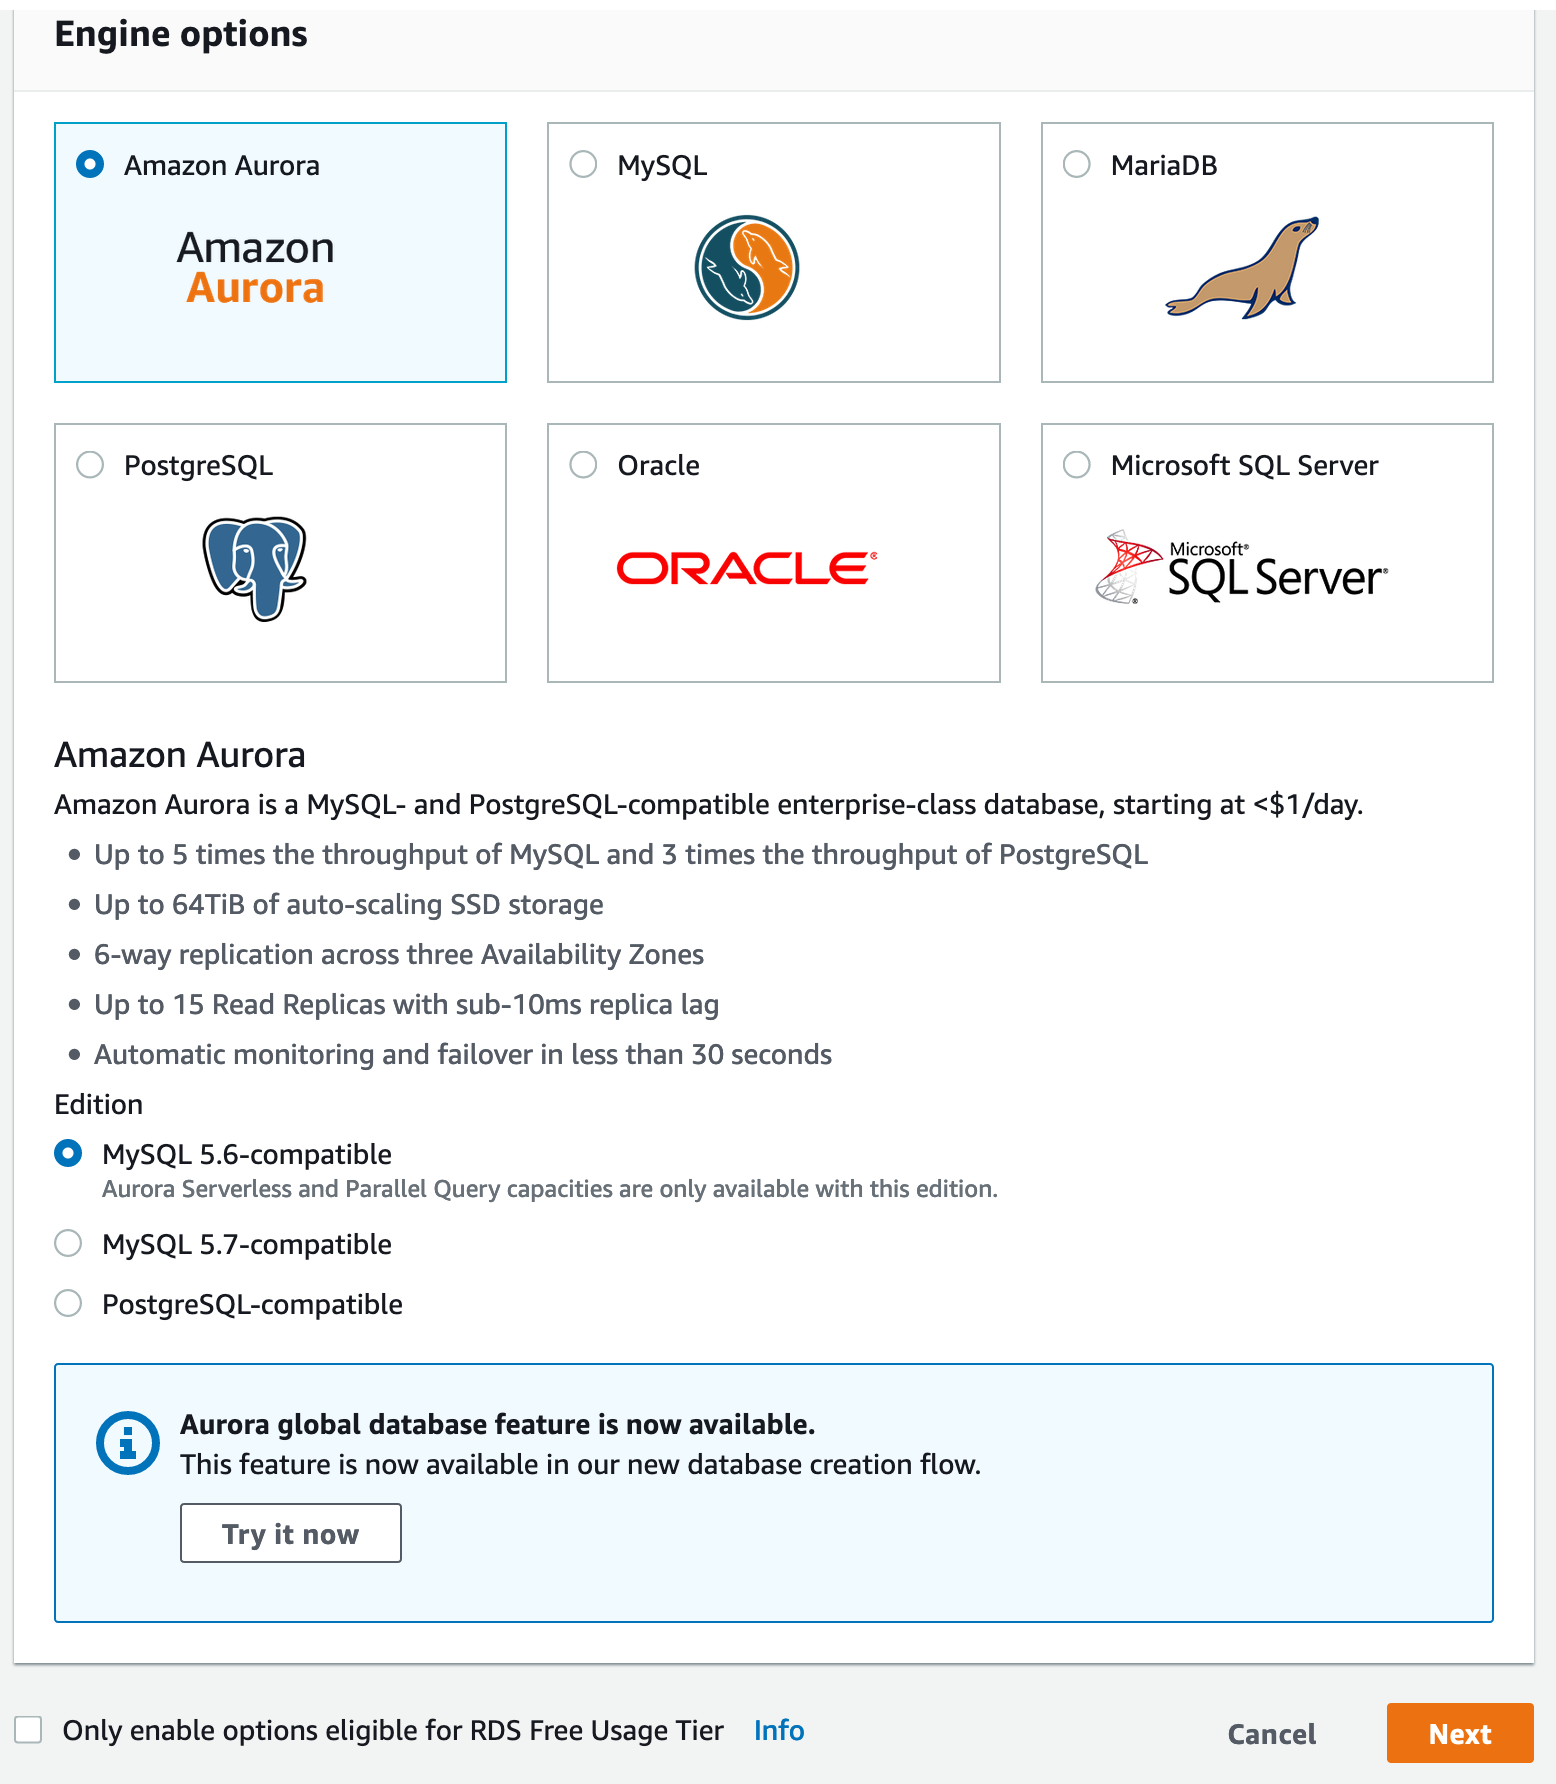
On the next screen, select Amazon Aurora with MySQL 5.6-compatible Edition. Also note that the Only enable options eligible for RDS Free Usage Tier checkbox is off, as Aurora RDS does not quality for Free Tier. Click Next.
-
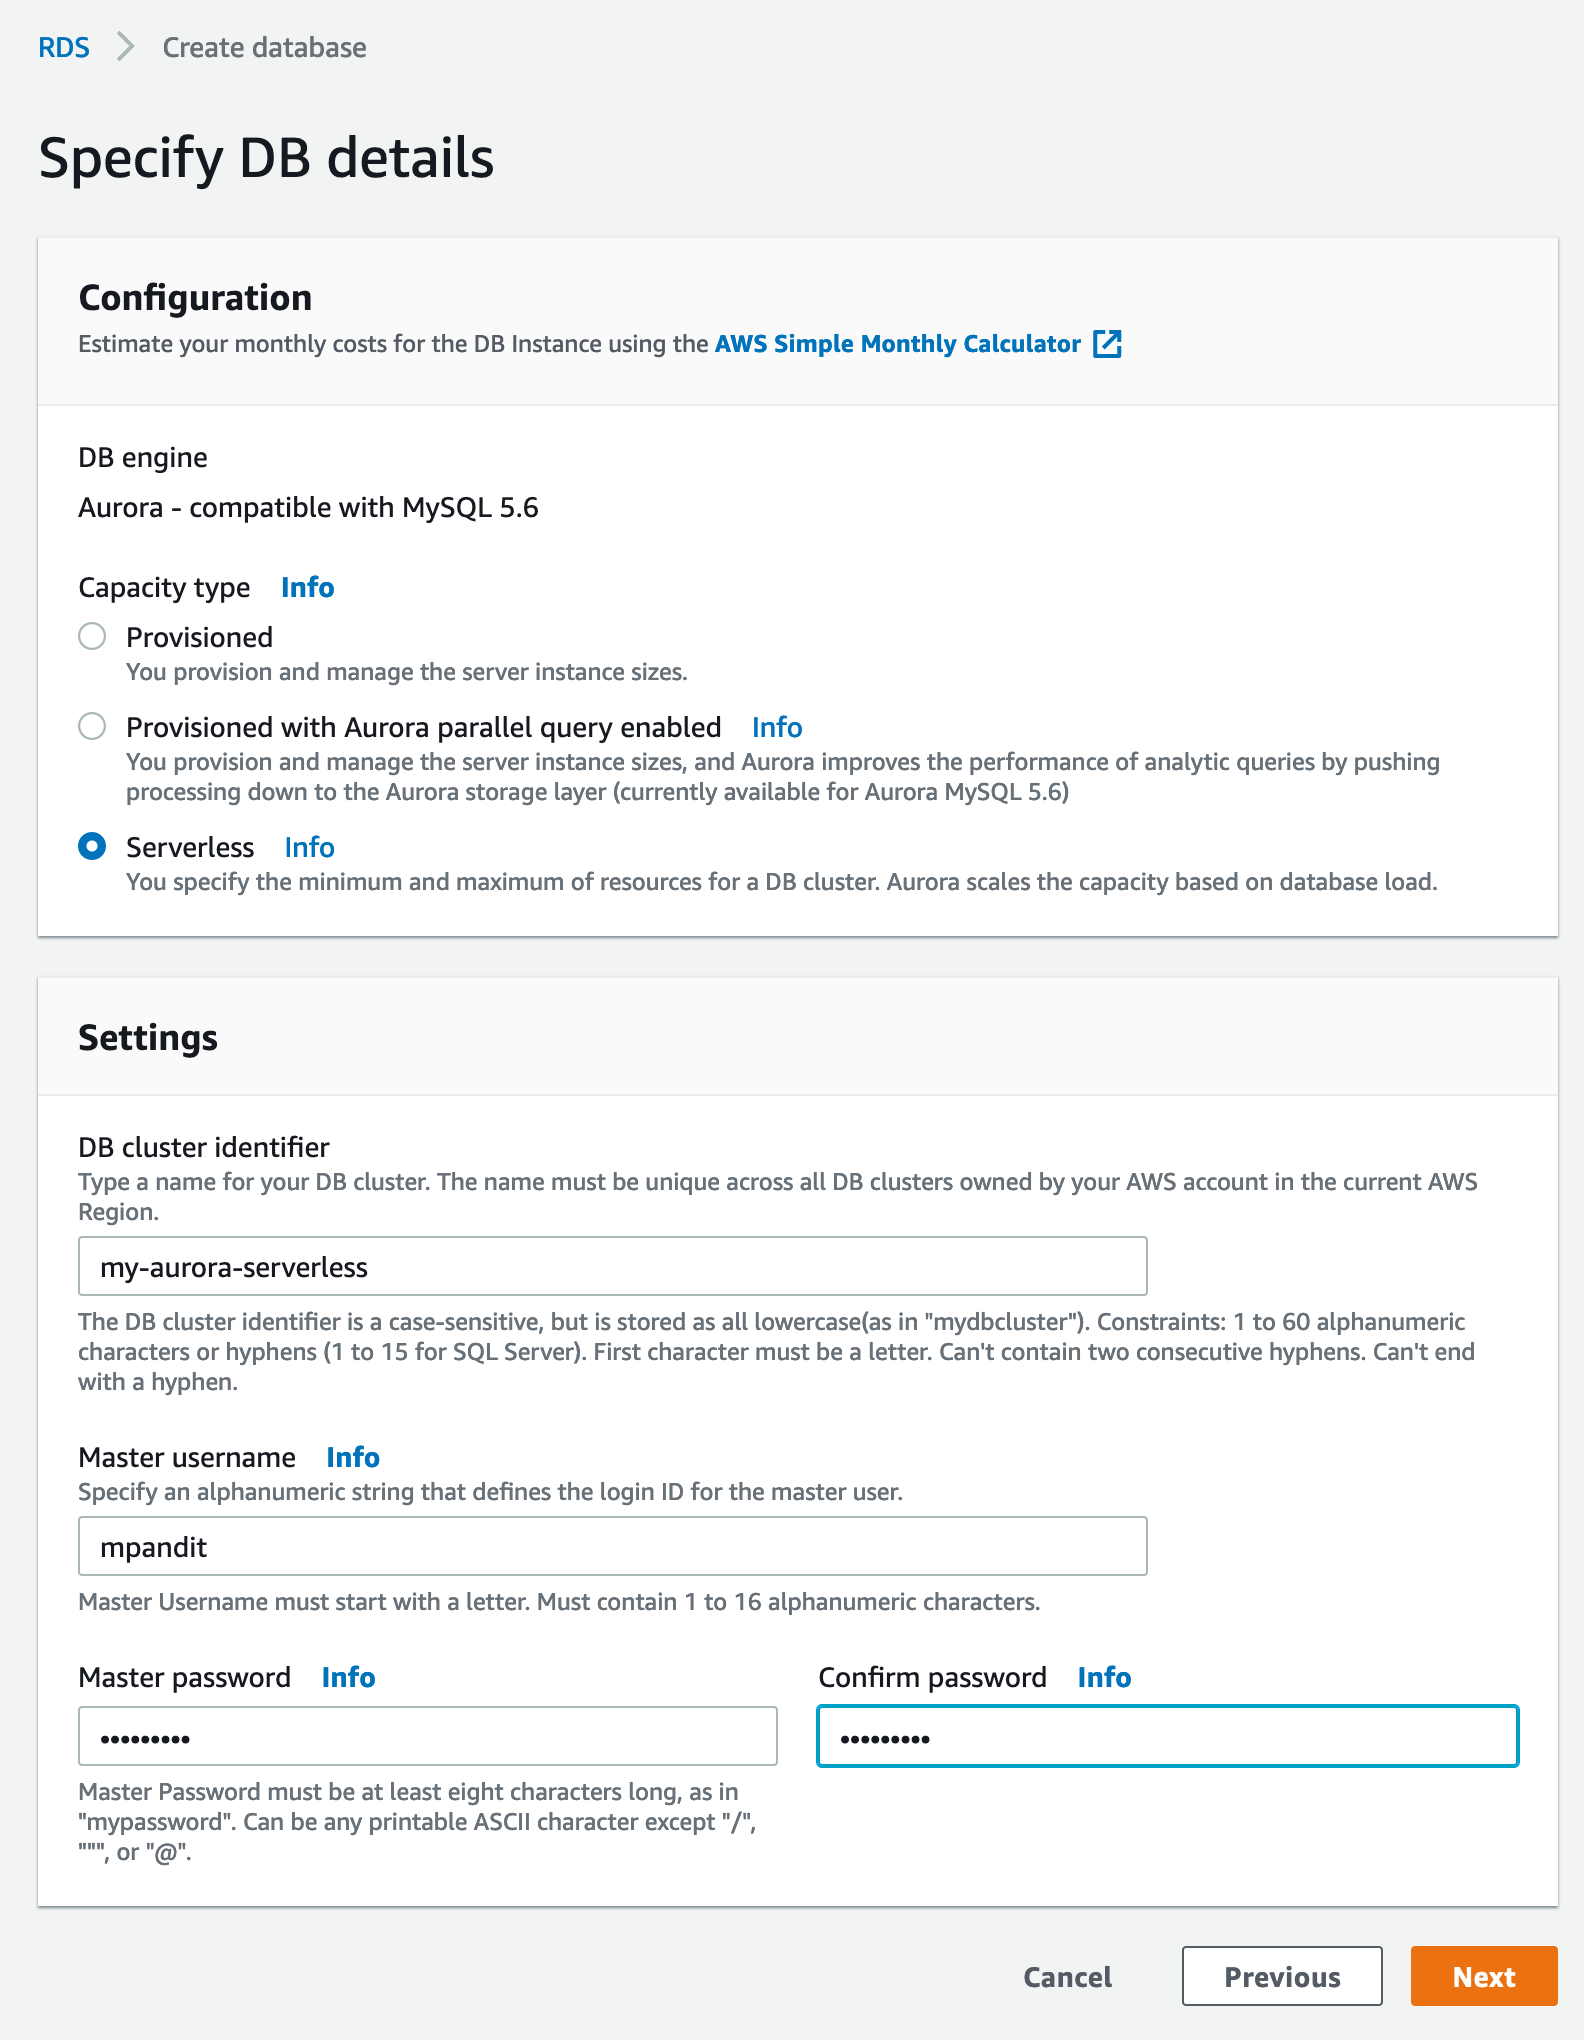
Select Serverless. You’ll notice the options for DB Instance Class dissappear. Under Settings, pick a cluster identifier, master username, and a password that you can remember. Click Next.
-
Next screen is where we pick the
ACUs. To keep costs in check, I’ll pick2ACUs as minumum and4as maximum.
-
Under Network & Security, we can keep defaults. Note that there are is no option to provision a public endpoint for Aurora Serverless, unlike other RDS Configurations. In other words, Serverless Aurora can only be accessed from within a VPC, and/or a peered network.
-
If we expand the Additional Configuration, there are options for parameter groups, backup retention, and encryption. Notice that Aurora Serverless is always encrypted at rest using the default RDS CMK (
aws/rds). You may specify another CMK. For now we leave everything as default. Click Create Database. -
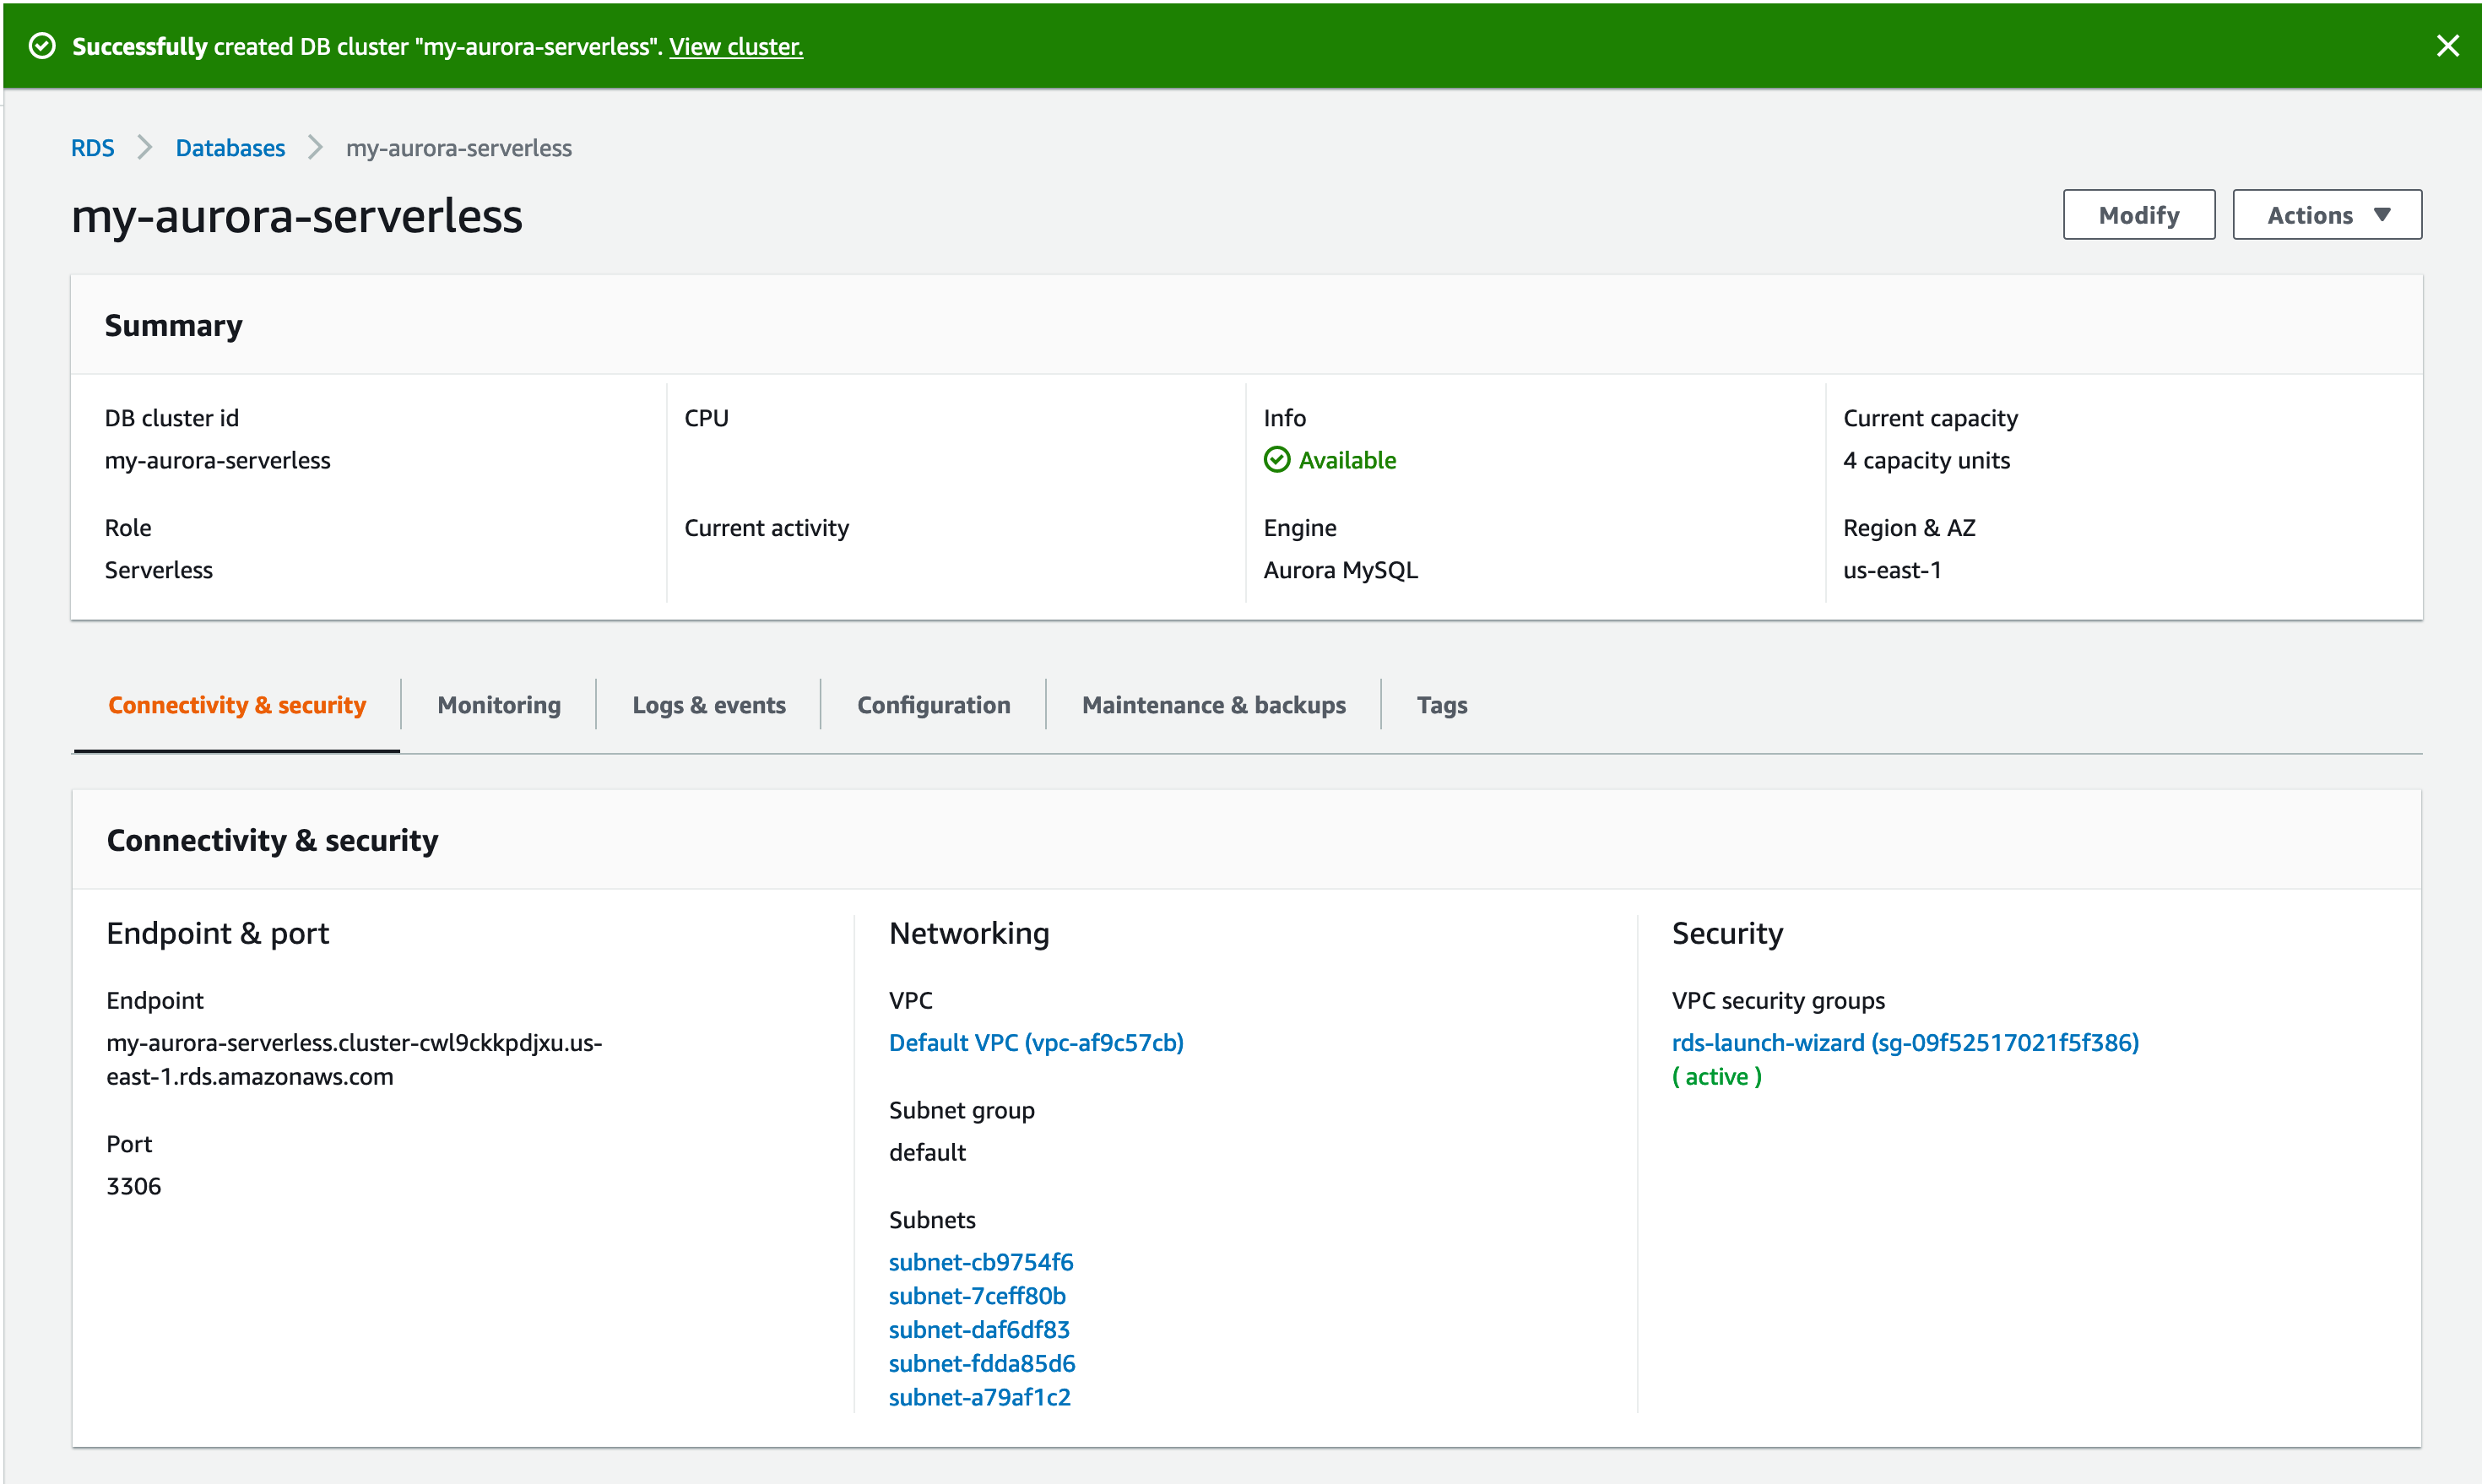
The next screen shows the the cluster being created. Notice the size of
4 capacity unitsonce it is created. It took about 3 minutes for me.
-
If we click on the DB Identifier, it will take us to the cluster details page. This is where we can get information about connecting to the cluster, as well as configuration, logs, etc. Feel free to click around. Notice that Logs & Events is empty. Even though we have our cluster set up, since there are no connections to it, there is no activity. Hence autoscale!
If we wait 5 minutes, we can see the cluster scale down to 0 ACUs and the Event Log showing the cluster being paused, as there are no active connections to this newly created cluster.
Connectivity
-
To connect to the cluster, we’d need the
Endpointfromstep 10. Mine looks likemy-aurora-serverless.cluster-cwl9ckkpdjxu.us-east-1.rds.amazonaws.com. The port number is 3306, which cannot be changed for Aurora Serverless. -
Provision an EC2 instance in the same VPC. Since I used the default VPC, I’ll have the instance with a public IP, so I can
sshinto it from my laptop’s IP. I already have a security group configured to do so, which I’ll attach to the instance. If this seems unfamiliar, please see EC2 documentation on launching an EC2 instance in a VPC. If there is an instance already provisioned and you can get to it, do so! -
Next, we install mysql client on the instance. I am using Amazon Linux AMI on a
t2.microinstance type.[ec2-user@ip-172-31-61-122 ~]$ uname -a Linux ip-172-31-61-122.ec2.internal 4.14.104-95.84.amzn2.x86_64 #1 SMP Sat Mar 2 00:40:20 UTC 2019 x86_64 x86_64 x86_64 GNU/Linux [ec2-user@ip-172-31-61-122 ~]$ sudo yum update -y Loaded plugins: extras_suggestions, langpacks, priorities, update-motd Resolving Dependencies --> Running transaction check ---> Package bind-libs.x86_64 32:9.9.4-73.amzn2.1.1 will be updated ---> Package bind-libs.x86_64 32:9.9.4-73.amzn2.1.2 will be an update ---> Package bind-libs-lite.x86_64 32:9.9.4-73.amzn2.1.1 will be updated ---> Package bind-libs-lite.x86_64 32:9.9.4-73.amzn2.1.2 will be an update ---> Package bind-license.noarch 32:9.9.4-73.amzn2.1.1 will be updated ...[ec2-user@ip-172-31-61-122 ~]$ sudo yum install mysql -y .. .. Installed: mariadb.x86_64 1:5.5.62-1.amzn2.0.1 Complete! - We can now connect to our cluster.
 [ec2-user@ip-172-31-61-122 ~]$ mysql -u mpandit -p -h my-aurora-serverless.cluster-cwl9ckkpdjxu.us-east-1.rds.amazonaws.com
 Enter password:

 ^C
This step will time out, if we went with all the default settings during Setup. This is because the RDS Security Group that was automatically created only allows
3306inbound from our IP address. We will need to open up that security group to our VPC. To navigate to the security group, go to Subnets, and look for a Security Group namedrds-launch-wizard. Verify the date/time in the description, as well as VPC ID to ensure you’re picking up the right one, in case you have multiple of them across many VPCs. If you click that Security Group and go to Inbound tab, you can see that it only allows inbound from a/32IP, which is your public IP. Let us open it up to our EC2 instance. We can either enter our VPC CIDR, the VPC’s default security group, or just the one instance’s private IP. To keep things simple, I’ll use the instance’s private IP. This is different than the public IP used tosshinto the server. To get the server’s private IP, we can use the instance metadata endpoint.[ec2-user@ip-172-31-61-122 ~]$ curl http://169.254.169.254/1.0/meta-data/local-ipv4 172.31.61.122 [ec2-user@ip-172-31-61-122 ~]$We can take this IP and stick it in the RDS security group, as
172.31.61.122/32replacing the<myIP>/32. This will only allow access from the instance we’re on, and not from anywhere else.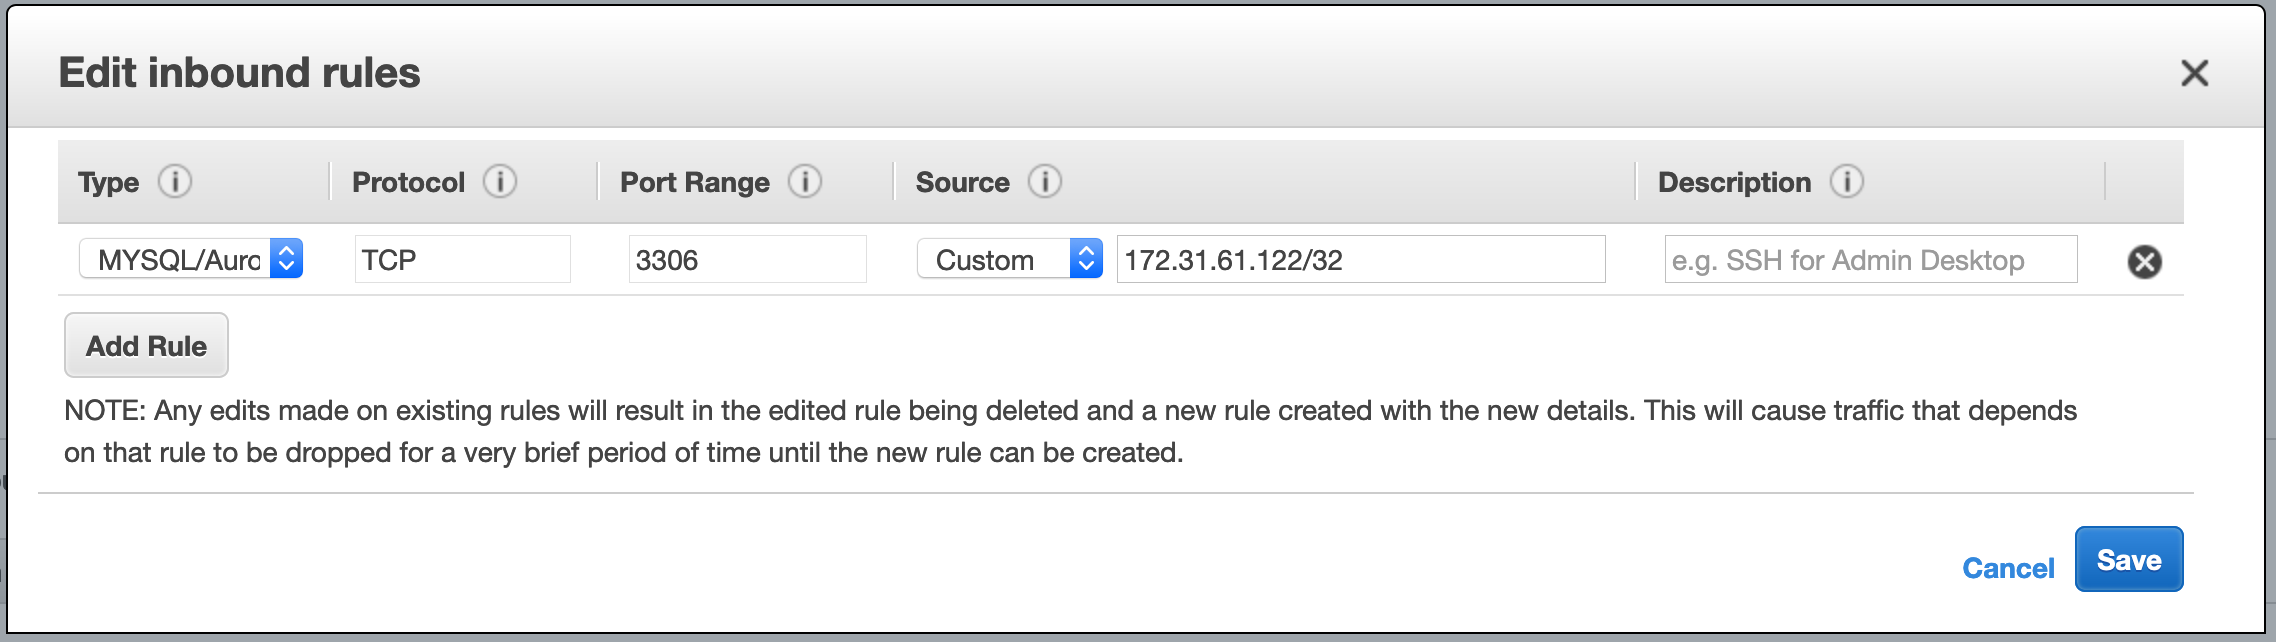
-
Once done, we go back to our EC2 instance and retry the above connection attempt.
BE PATIENT DURING THIS STEP!
 [ec2-user@ip-172-31-61-122 ~]$ mysql -u mpandit -p -h my-aurora-serverless.cluster-cwl9ckkpdjxu.us-east-1.rds.amazonaws.com
 Enter password:

 Welcome to the MariaDB monitor.  Commands end with ; or \g.
 Your MySQL connection id is 10
 Server version: 5.6.10 MySQL Community Server (GPL)

 Copyright (c) 2000, 2018, Oracle, MariaDB Corporation Ab and others.

 Type 'help;' or '\h' for help. Type '\c' to clear the current input statement.

 MySQL [(none)]>
Please note that it will take a while (~30 seconds for me) for this to work. This is because the cluster will take some time to initialize and start. Now lets go to the Cluster Console and check the events log.
- We can now play with this cluster, like so
MySQL [(none)]> create database addressbook; Query OK, 1 row affected (0.01 sec) MySQL [(none)]> use addressbook; Database changed MySQL [addressbook]> create table address ( name varchar(100), city varchar(50), zip varchar(10) ); Query OK, 0 rows affected (0.03 sec) MySQL [addressbook]> insert into address (name, city, zip) values ('Joe','Dublin','94568'); Query OK, 1 row affected (0.00 sec) MySQL [addressbook]> select * from address; +------+--------+-------+ | name | city | zip | +------+--------+-------+ | Joe | Dublin | 94568 | +------+--------+-------+ 1 row in set (0.01 sec) -
On the Logs & events tab, we can notice the cluster activity. The cluster
resumedas we connected to it, and scaled down from4 ACUsto2 ACUssince we are not really doing much.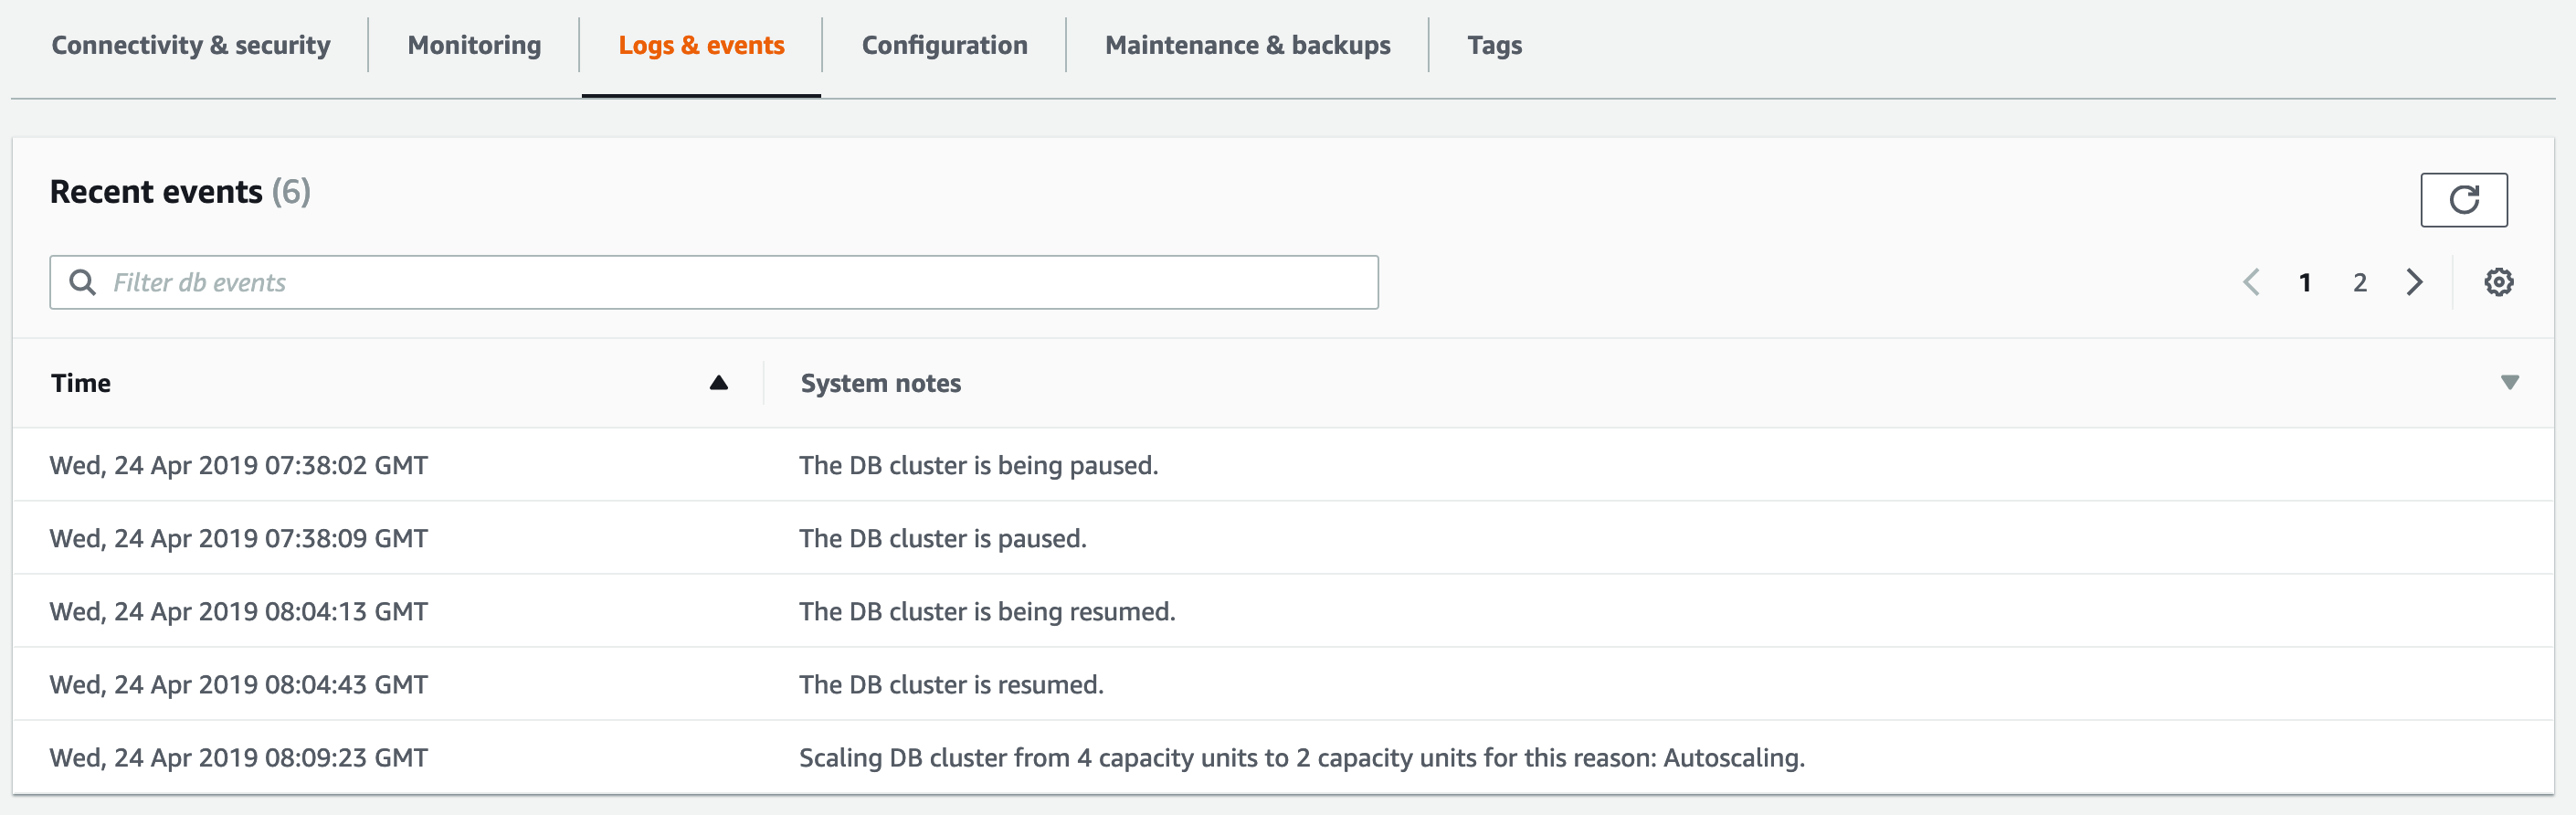
-
On the Monitoring tab, we can see the scaling activity, as well as the number of connections as
1which is the MySQL client from the EC2 instance.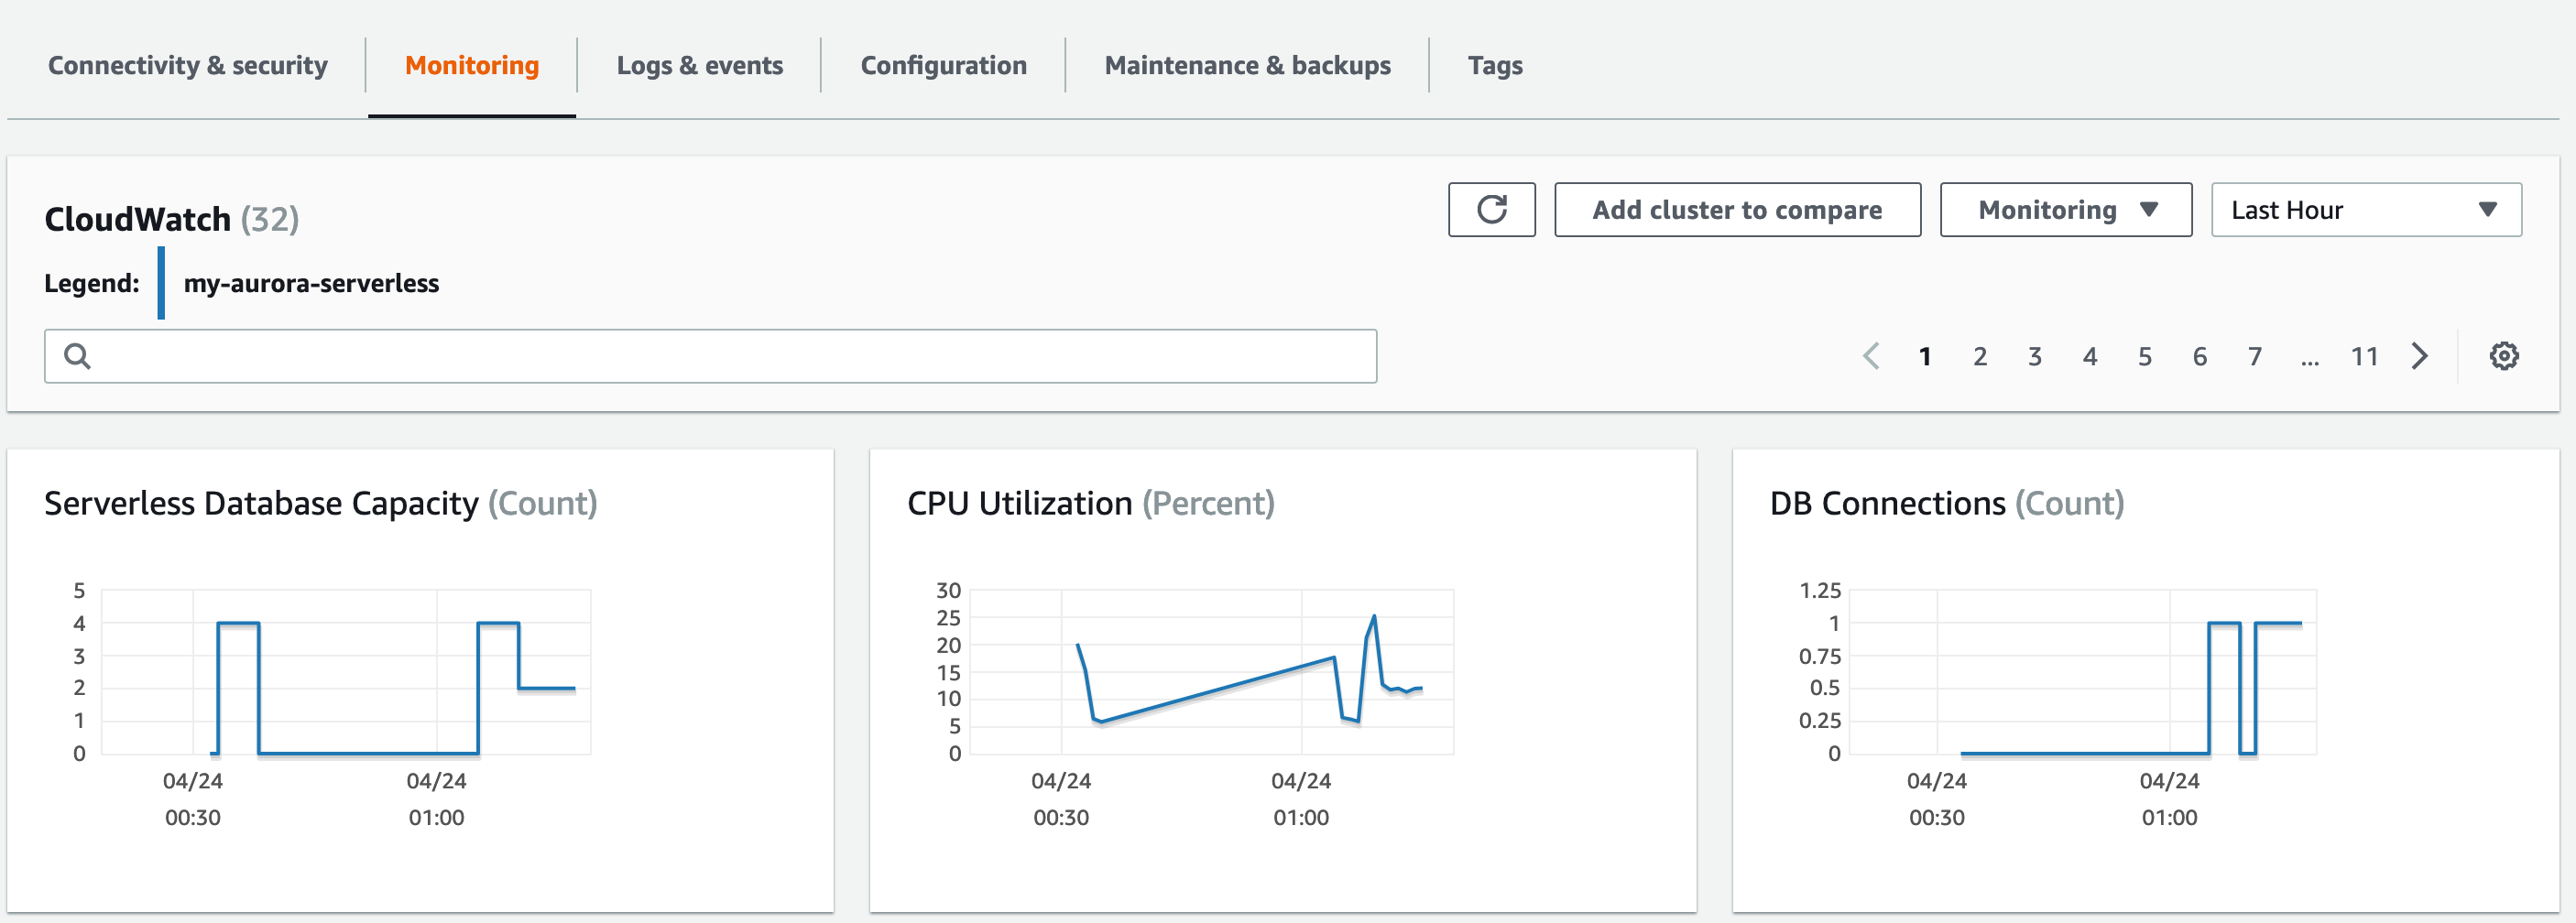
-
Now let us close the MySQL client and wait for the Aurora Serverless to shut down the cluster entirely.
MySQL [addressbook]> exit; Bye - In the Configuration tab, notice that
Pause compute capacity after consecutive minutes of inactivitywhich says5 minutes. After 5 minutes of us terminating the MySQL session, we should expect the cluster to scale down tozero ACUs.
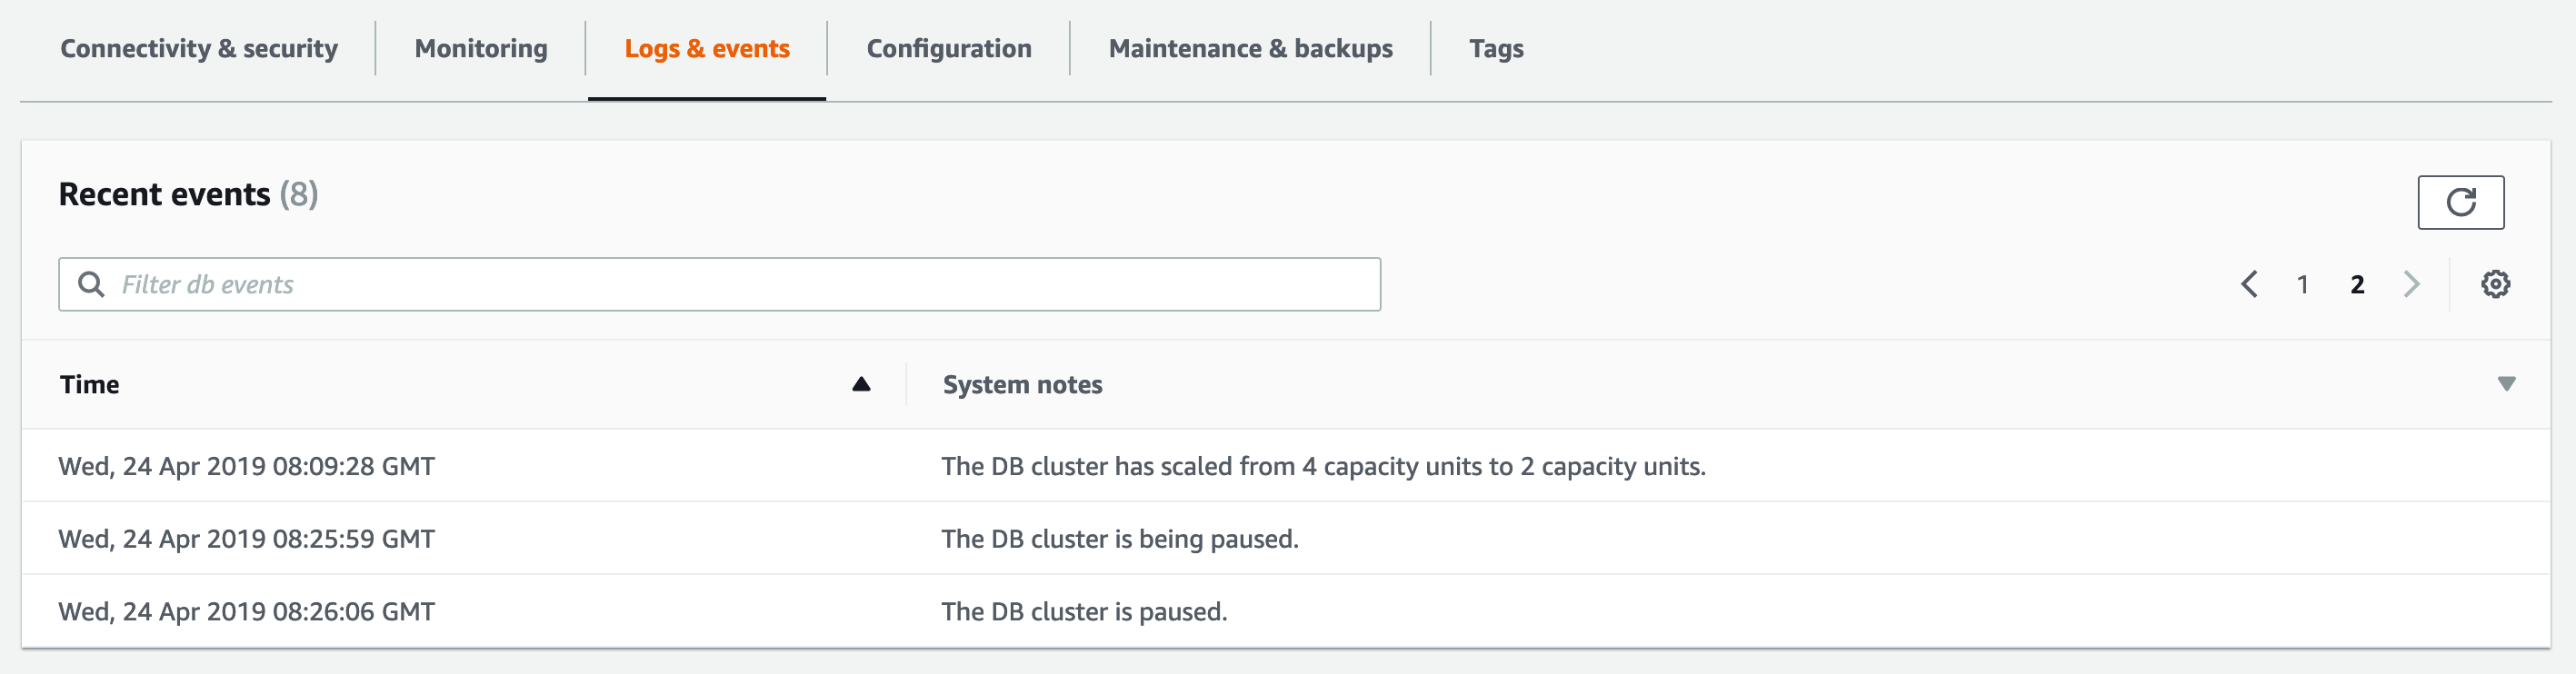
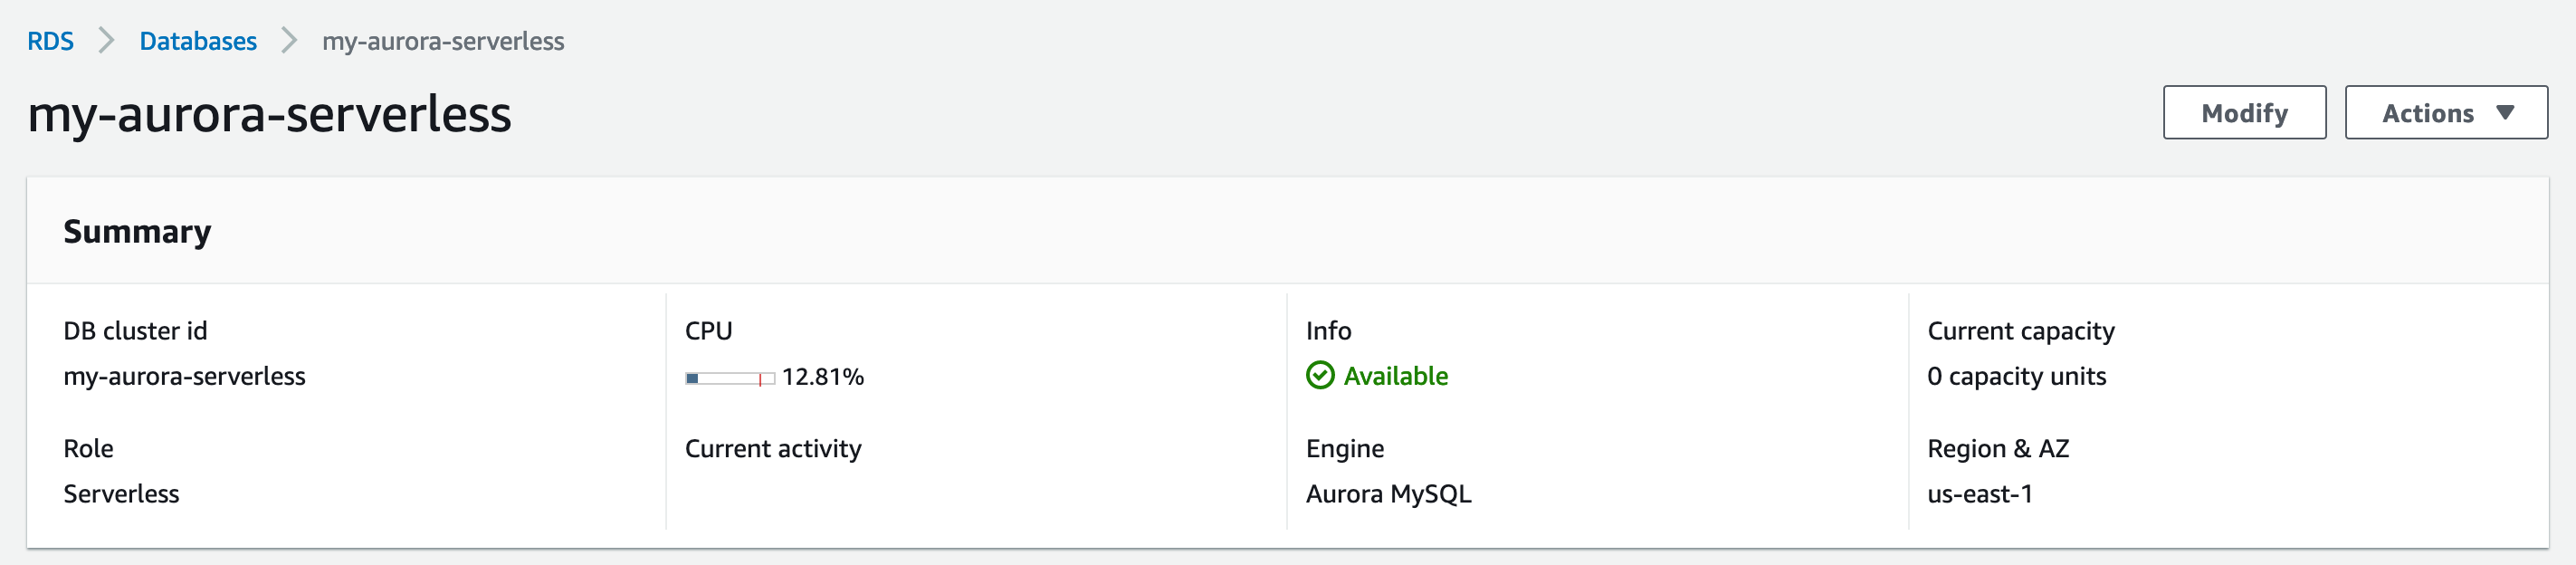
Refresh the page and you’ll notice the Current capacity to indicate 0 capacity units, as our cluster has shut down, or paused. If we reconnect from MySQL client, and be patient, the cluster will come alive, or unpause, or scale up from 0 ACUs.
Cleanup
To avoid unwanted charges, we will delete this cluster. However, since we left the Enable Deletion Protection checked as default setting, we’ll need to mofify the cluster to disable it. Click Modify and scroll all the way down, and uncheck the Enable Deletion Protection checkbox, click Continue. On the next screen, click the Apply immediately radio button, and, click Modify Cluster.
Now click Actions and click Delete. Pick No to create final snapshot, and check the acknoweldgement checkbox. Click Delete DB cluster.
Terminate the EC2 instance as well, if you created one while following this post and do not need it anymore.
Tips & Gotchas
Now that we have seen Aurora Serverless in action, here are a few gotchas :
- Set the DB connection timeout to at least a minute, if not more. This is for the initial connection latency, while the cluster is
unpausedandscaled upfrom Zero ACUs. - Make sure the connections are closed - as long as there is even one connection, the cluster will sit at minumum ACUs and not pause. For example, AWS Batch containers will exit upon completion, terminating any connections. In cases where the process does not exit, ensure to shutdown the connection pool to avoid this situation.
- Configure the RDS Security group securely, make sure you only allow connections from known and needed hosts.
- The port number cannot be changed from 3306.
- There are no replicas, the instance is all we got.
- Do not use Aurora Serverless for always on type applications. This will not be cost effective.
- Design the test harness where the initialization and destruction is guaranteed to run pre and post test runs when using this set up for running tests. In other words, if the tests exit uncleanly, there is a chance that the connection(s) will continue to be established to the database, preventing a pause.
Pricing
The pricing gets a little tricky, we pay by the ACUs, the IO requests, and storage.
For us-east-1, the cost basis is $0.06 per ACU per hour for compute+memory, $0.10 per GB per month for storage, and $0.20 per 1MM IO Requests for the number of operations. The ACUs are billed per second with a minimum of 5 minutes every time the cluster is running or unpaused.
The exercise above did cost us a little, as mentioned earlier.
References
I’d appreciate your comments and feedback below.