AWS KMS and Envelope Encryption
Every service needs encryption at one point or another - passwords to the database, credentials to an external service, or even entire filesystem or files. Sticking the secrets, or keys in configuration files seems a quick and easy option. However, it carries security risks, even if these configurations are managed outside of the source code. On top of it, the keys used to encrypt/decrypt the data bring additional security implications and requirements in terms of storage, audit, and lifecycle management.
AWS KMS, or AWS Key Management Service is a fully managed service to store and manage keys. Any AWS service which supports encryption - S3 buckets, EBS Volumes, SQS, etc. uses KMS under the hood. KMS is more than just a key manager, it can also be used to encrypt large volumes of data, using a technique called Envelope Encryption.
In this post I will cover KMS, and the why, what, and how of Envelope Encryption.
An ideal key management system should be highly available, control access to the master key(s), audit the key(s) usage, and manage key(s) lifecycle. This becomes all the more important with microservices, as the number of such secrets can grow to a large number, if the services being composed to offer a functionality all need their own secrets.
Setup
- Access to AWS Console (optional, but preferred)
- AWS CLI which is configured with credentials that allow for
AWSKeyManagementServicePowerUser - AWS Shell, which I prefer over using the CLI
opensslandbase64commands (I am using a Mac OSX Sierra)
AWS KMS
KMS keys are referred to as CMKs (Customer Master Keys). The CMKs are used to encrypt and decrypt data, or other keys - as we will see below. Customers can also choose to upload their own keys to KMS. As mentioned earlier, AWS uses KMS to manage keys for it’s own services. These keys are called AWS-Managed CMKs, as opposed to the ones created by the customer, called Customer-Managed CMKs. Customer-Managed CMKs can be used for AWS services if customers want greater control over key-rotations, etc. KMS provides symmetric encryption.
If you have, in the past, used any AWS service with encryption, AWS has created CMKs for it on your behalf. These will be the AWS-Managed CMKs - one per service per region. To check it out, log in to the AWS Console, and click Encryption keys under IAM to see the AWS Managed Keys. The AWS-Managed CMKs show up with the orange AWS icon.
Here is what my keys look like -
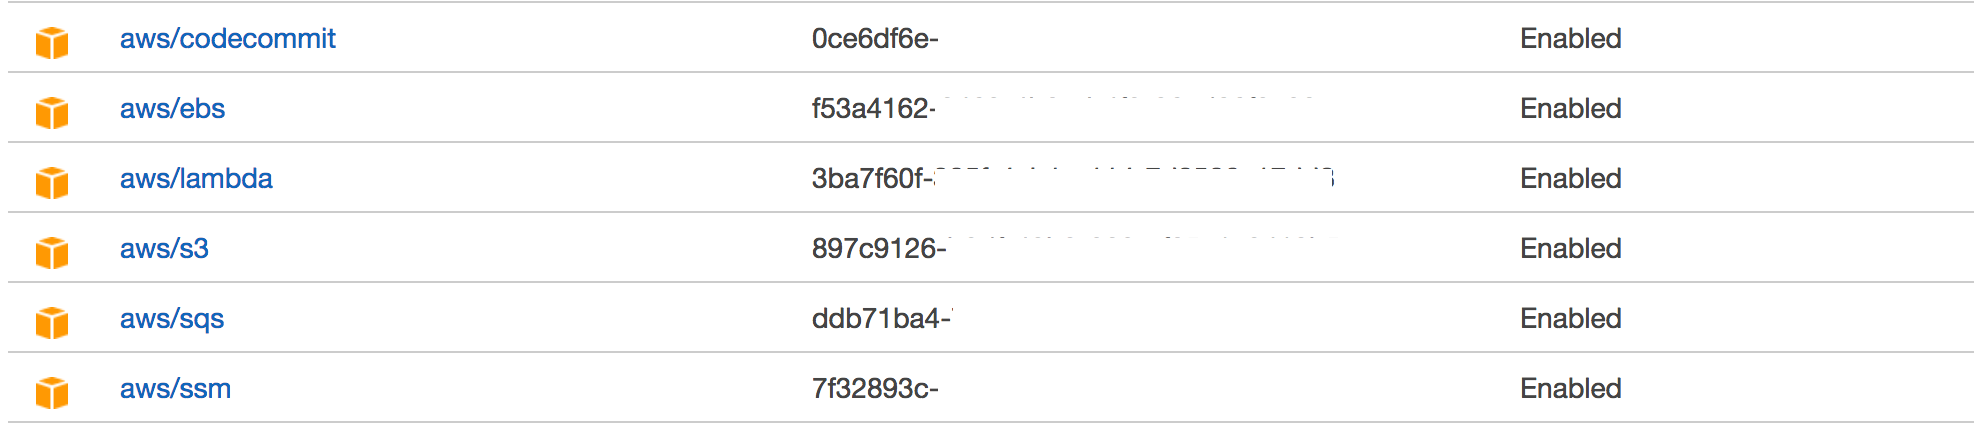
The keys are region specific, so you may want to pick different regions to see the CMKs in those regions.
The CMKs can never be retrieved or seen in plaintext - AWS uses its underlying infrastructure to keep the CMKs secure, highly available, and durable.
Data should be only decrypted where it is needed, not at some server and then transmitted over unencrypted. IAM policies control who can encrypt and/or decrypt using the CMKs, and these policies can a be part of IAM roles associated with AWS resources. IAM policies also control who can administer the CMKs.
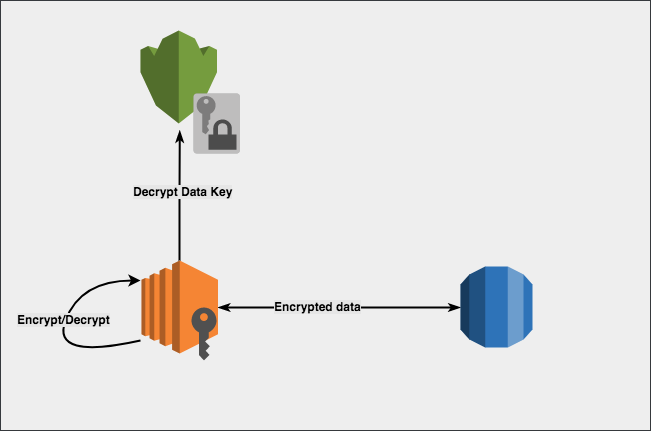
KMS can be used to decrypt/encrypt up to 4KB of data. This begs the question - how does AWS manage to encrypt EBS volumes and large S3 files with KMS? The answer is - Envelope Encryption. The CMKs can be used to generate a different type of keys called data keys, which can then be used to encrypt/decrypt data. However, the data keys, when generated, are returned in plain-text, and AWS does not store or manage them. It is up to the customer to store and use the data keys on their own.
Envelope Encryption
Here are the steps to implement Envelope Encryption -
- Create a new CMK, or re-use an existing CMK. This can be done the AWS Console, or with CLI using create-key.
- Use generate-data-key to get a data key.
- This returns the plain text data key, and also an encrypted (with the specified CMK) version of the data key. The encrypted version is referred to as a CipherTextBlob. Store the returned CipherTextBlob (we will need it later). The CipherTextBlob has metadata which tells KMS which CMK was used to generate it. Store this CipherTextBlob.
- Use the plain-text data key to encrypt any amount of data.
- Throw away the plain-text data key, but be sure to store the CipherTextBlob along side the encrypted data.
- To decrypt, use the Decrypt API, sending it the CipherTextBlob from step (3).
- The above step will return the plain text data key (the same one we threw away). Use this key to decrypt the data.
- Throw away the plain-text data key.
- To encrypt more data, repeat steps 6, 7, 8 except use the plain text key to encrypt instead of decrypt.
This ensures that the encrypted data will not be compromised as long as the plain-text data key is destroyed after each encryption/decryption process. At best, someone can get to the CipherTextBlob, but unless they can call KMS to decrypt it, the encrypted data cannot be decrypted with just the CipherTextBlob.
It is very important to note that KMS has no record of the data key. It is us who are managing the data key. If you were to throw away the CipherTextBlob after deleting the plain text key, the encrypted data can NEVER be decrypted.
Envelope Encryption with CLI
I am using AWS Shell here, but you may use AWS CLI just as easily. You’d need to prefix all commands with aws if so.
In the steps below, AWS Shell has the prompt aws>, while terminal shell has the prompt $.
Also, in real life situations, CMKs should not be created willy-nilly, and should have IAM policies associated with them to restrict who can manage, and use them.
1. Create a new CMK (proceed to step 3 if you already have a CMK that you’d want to use)
aws> kms create-key --description "This is our master key"
{
    "KeyMetadata": {
        "Origin": "AWS_KMS",
        "KeyId": "30f0d765-d120-41ab-b078-************",
        "Description": "This is our master key",
        "KeyManager": "CUSTOMER",
        "Enabled": true,
        "KeyUsage": "ENCRYPT_DECRYPT",
        "KeyState": "Enabled",
        "CreationDate": 1506814355.941,
        "Arn": "arn:aws:kms:us-east-1:************:key/30f0d765-d120-41ab-b078-************",
        "AWSAccountId": "************"
    }
}
2. Create an alias for this key (optional) - I prefer using aliases over key IDs.
aws> kms create-alias --target-key-id 30f0d765-d120-41ab-b078-************ --alias-name "alias/our-master-key"
3. Get Data Key
Now that we have the CMK, let’s create a data key using this CMK. We will use AES_256, which will use AES to generate a 256-bit data key. You can see how aliasing the CMK is relatively handy than using the key-id.
aws> kms generate-data-key --key-id alias/our-master-key --key-spec AES_256
{
    "Plaintext": "************2abcgdF4rWGaG54esFdaNnfTWBXezcU=",
    "KeyId": "arn:aws:kms:us-east-1:************:key/30f0d765-d120-41ab-b078-************",
    "CipherTextBlob": "******************************rP1R8rH5AgbwKqWvkXdAHHltn9RJtKSH/XCI5vPSjdOgGx2TYb7p2jjsTCgcOV65rODtZ7TDqpOL+bw=="
}
aws>
The key-id returned here is not of the data key, but of the CMK. Remember, KMS has no record of any data keys it generates.
4. Encrypt Data
We store the CipherTextBlob, and use the Plaintext to encrypt some data. You can use any programming language of your choice to do so. This is where it gets interesting. The blob as well as the key and CipherTextBlob is all base64 encoded. They need to be decoded before they can be put to any use. I will use base64 and openssl.
This is not how real production usage will be. While I am using a simple string to demo encryption/decryption using data keys, in the real world this would be happening on entire databases and giant filesystems.
First, we base64 decode our plaintext key and store it in a file. In this example I am using a tmp folder in my home directory.
$ echo '************2abcgdF4rWGaG54esFdaNnfTWBXezcU=' | base64 --decode > ~/tmp/plaintext_key_decoded.txt
We have now decoded the base64 plain text key as ~/tmp/plaintext_key_decoded.txt file. Next, we encrypt a simple string, Hello World using openssl.
$ echo "Hello World!" | openssl enc -e -aes256 -k fileb://Users/mpandit/tmp/plaintext_key_decoded.txt > ~/tmp/encrypted.txt
Here, we are encrypting Hello World! using openssl command line, using the decoded key that we had saved in a file. We are saving the result of this encryption in ~/tmp/encrypted.txt.
Next, we delete the plain text key, while making sure we have the base64 decoded CipherTextBlob stored.
$ rm ~/tmp/plaintext_key_decoded.txt
5. Decrypt Data
Just like the plain text key, the CipherTextBlob is also base64 encoded. Let us decode that and store that as well. We will need this later on to decrypt the data we have encrypted.
echo '*****************************rP1R8rH5AgbwKqWvkXdAHHltn9RJtKSH/X3Q9VNjCgcOV65rODtZ7TDqMUmgPcZzwaiPSDXrv/ZBr4+safgompOL+bw==' | base64 --decode > ~/tmp/ciphertext_blob_decoded.txt
Now we are ready to decrypt the encrypted data. Since we have deleted the plain text data key just like we should, we will ask KMS to give us the plain text data key by decrypting the CipherTextBlob.
Since the CipherTextBlob contains metadata, we do not need to tell KMS any information about the CMK that was used to encrypt the data key.
aws> kms decrypt --ciphertext-blob fileb:///Users/mpandit/tmp/ciphertext_blob_decoded.txt
{
    "Plaintext": "************2abcgdF4rWGaG54esFdaNnfTWBXezcU=",
    "KeyId": "arn:aws:kms:us-east-1:************:key/30f0d765-d120-41ab-b078-************",
}
KMS has given our plain text key back. Let us use openssl to decrypt our encrypted data. We go through the same exercise of base64 decoding the plain text key before we can use it with openssl. We use the same filename to keep things simple. Also I am too lazy, so copy-paste helps.
$ echo '************2abcgdF4rWGaG54esFdaNnfTWBXezcU=' | base64 --decode > ~/tmp/plaintext_key_decoded.txt
Next, we pass this to openssl, this time to decrypt.
$ cat ~/tmp/encrypted.txt  | openssl enc -d -aes256 -k fileb://Users/mpandit/tmp/plaintext_key_decoded.txt
Hello World!
And we get our encrypted data decrypted. In the real world, this same process happens at a much larger scale. Like encrypting EBS Volumes, S3 files, or even local storage outside of AWS. Also, these steps can be integrated in code using the crypto libraries available for the programming language being used.
6. Audit Trail
AWS CloudTrail will show the usage log of the CMKs. This will not show up on the event log on the console, but in the raw json files that CloudTrail is configured to write to. This is used to audit the CMK usage.